


Furniture Makeover: the Beast > Belle
- Oct 23, 2017
- 7 min read

BACKGROUND:
I'm project-oriented, hands-on, would rather go to the dentist than read instructions, I love a good deal, and love a good furniture makeover even better. I'm not afraid to get my hands dirty and with that said, am not afraid to go to the store mid-project, partially covered in paint. Usually it's the craft or hardware store at this point, so I figure they have to see more than just me decorated in paint and in my finest painting clothes. One of my many hobbies is to repurpose and update furniture pieces. Below you'll find step-by step instructions on how to give furniture a makover, peppered with behind-the-scenes comic relief.
BEDROOM SUITE CHALLENGE ("THE BEAST"):
The first step to creating any transformation is seeing the "potential", which was the recurrent theme for this bedroom suite. For a little something different, we'll call this obnoxiously large and loud bedroom suite "the Beast" as we journey through its transformation from beast to beauty!
(Side note, I may or may not have been listening to the Beauty and the Beast soundtrack while creating this post...)
I discovered the Beast for sale online when I was perusing the local online furniture ads. I immediately was drawn to her potential and the "too good to be true" deal (or was it...?!?) of 5 pieces (headboard, footboard with sideboards, dresser, mirror, and nightstand) for only $100...


The problem was, I was visiting family back in Nebraska, and the Beast was currently residing in North Carolina... I knew I would need to do a little convincing with hubby, but after sending him the pictures, reminding him of the "potential", and letting him know we could have all 5 pieces for a mere $100, hubs sweetly obliged to figuring out a way to acquire the Beast, despite not having the necessary vehicle for transportation... Hubs for the win! Not only was it large and in charge, but it was a beast to move, so the name was proving to be quite fitting.
Once I arrived back in North Carolina, thanks to my awesome hubs, the Beast was setup in the garage, eagerly awaiting her makeover!

Seeing her dire condition in person made me realize, I might have signed up for more than I bargained for... (see close up picture...) But never turning down a good challenge, I went straight to work, hopeful that this beast would transform into a Southern "Belle" in no time!

INSPECTION:

After assessing the damage and current situation, the Beast's prognosis was not looking so good... She was covered in scratches, bruises, and gouges. I knew she would be in need of a major sanding and a LOT of TLC to help out her current condition.
After inspecting her jewelry (aka the hardware), I only discovered two missing knobs on the nightstand, so felt that was a minor victory. I knew I would be able to find some coordinating pieces to make up for the missing knobs, so I tabled that step until the end.
Below is a picture from the Beast's "good side"...

1st STEPS:
First, I removed all of the Beast's jewelry (aka the hardware). I then removed the drawers and discovered a few drawer slides in need of repair. Clearly I did not inspect our furniture throughly before making the purchase. :) So I used a hammer and screwdriver to gently make the necessary repairs and adjustments. Easy peasy.
She also had some "unique" and unfortunate flair that was not helping her case (aka the wishful thinking fleur-de-lis accents that in actuality looked more like a makeshift eagle...) I knew removing the eagles and her outdated accents would help to give her the update she desperately needed. Using a paint scraper, hammer, and wedge, I started to pry and chip away at the eagle flair accents. Some pieces were easier to remove than others...

With a lot of patience and persistence, the eagles were removed! Success!


I also removed the extra outdated spindles from the headboard and footboard to freshen up the look, which in hindsight was a smart move. Not only did it update the look, but I also now have some fun vintage spindles to use for other projects, bookends, or decor. I filled in the screw holes with wood filler and lightly sanded them to create a smooth finish.
I then used a small hand-held power sander and sanded the heck out of the Beast. And re-sanded, sanded some more, and sanded again.
Safety Sam Step: Make sure to wear a proper mask when sanding and painting!

I started with coarse sand paper (around 60 grit) for the tougher eagle areas that needed more love, then moved to medium grit paper (120) and finally the finer girt paper (180 - 220). FYI, the higher the number, the finer the sandpaper.

I had to put in extra sanding and elbow grease to the places where I removed the eagle design.

I then reinspected the damage and noticed a few cracks and remaining small gouges. I proceeded to fill in the cracks and gouges with wood filler, and then I sanded the pieces again. My hubby did help me with some of the final sanding so credit given where credit is due.

Unless I was going to spend all month on this piece, there was no way I was going to keep sanding until every knick and gouge was perfectly nonexistent, so I settled for "close enough" and called the slight imperfections "character" and moved on.

CHALK PAINT (THE FUN BEGINS):
First, I draped plastic underneath the Beast to avoid painting mayhem later. Since there were many pieces to paint, I opted to use this Wagner Paint Sprayer (instead of a brush), for most of the painting to speed up the time of the project.


Since I would be using a large amount of paint, I went the more cost effective route and purchased a gallon of paint in a "flat, chalk-like" finish. My choice of color was called "Cozy White" which was a lovely cream color. Fun fact, Lowe's can make almost any color of paint there in a flat finish which is much more cost effective and still gives you that chalk paint-like finish.
I clothed myself in my best painting garb, a mask, and latex gloves and went to town painting. The first few pieces went smoothly. It was only the pieces with the eagles removed that required quite a few coats of paint. In hindsight, I probably should have primed these parts, but lessons learned for next time! Using smooth even gestures (similar to spray painting), I carried on... The goal is to do light, even coats, while letting each coat dry before reapplying... but...

Since patience isn't my best quality when it comes to painting, I liberally loaded on WAY too much paint which resulted in a few inconsistently painted parts and one too many drips... I knew my only choice now was to wait for the extra thick mess to dry and then re-sand and repaint a few parts... So I waited for it to dry, and waited, and waited some more.

GIF compliments of GIPHY.com
After a day of drying and then re-sanding, it was back to painting. Unfortunately the paint sprayer had other plans as it started spurting and gurgling out all sorts of bubbles and thick globs of paint all over my new freshly sanded piece... Again, my lack of painting patience got the best of me, and instead of being patient for it to dry again, I took the approach of slopping on more bubbly paint with the paint sprayer to cover up the previous bubbles and mishap. To save you the tedious details, let's just suffice it to say, God was really wanting to work on my patience that week as I had no choice but to let it all dry, re-sand yet once again, and start fresh again the next day... this time with a cleaned out paint sprayer and a new attitude... :)
Just a fun reminder that there's beauty and lessons learned even in the chaos, you just have to look for it. As our good friend Bob Ross would say..

GIF compliments of GIPHY.com
FINISHING TOUCHES:

After way too many coats of paint, I was finally content with the overall look. It was time for the finishing touches. I lathered on Annie Sloan Soft Wax all over the piece, making sure to generously cover and rub the wax into the surfaces, corners, and nooks and crannies. This helps to seal the paint, keeps the paint from chipping off, and provides a protective coating to your furniture to give it a beautiful finish. Clear polyurethane protecting finish can work as well.

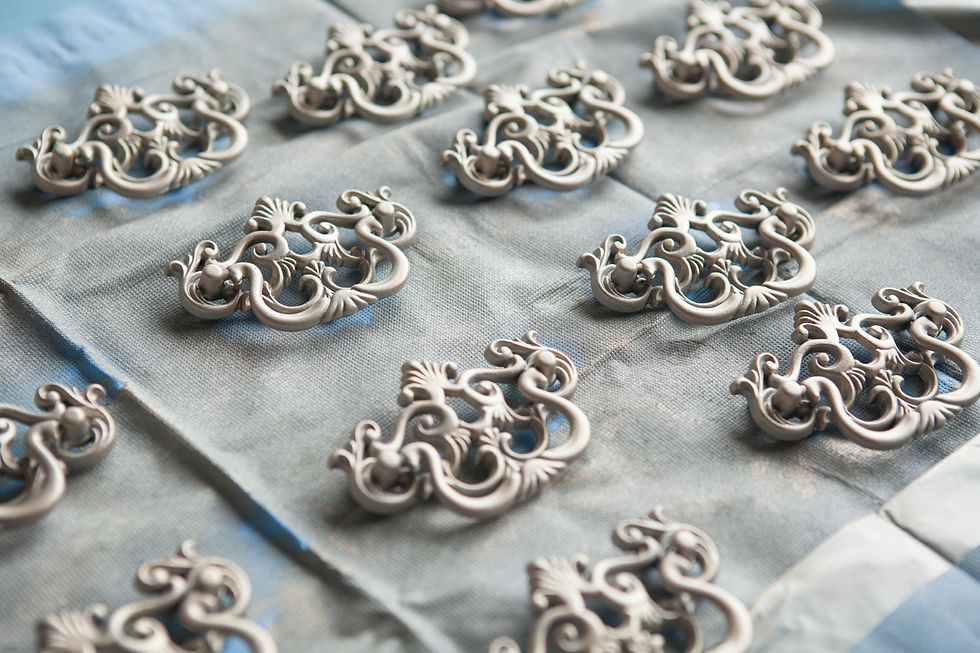
HARDWARE:
I completed the piece by updating the Beast's jewelry (aka hardware). Since this hardware had quite a bit of character, I decided to keep it instead of buying new, and opted to instead give it a facelift.

I first sprayed the hardware with Rust-Oleum Metallic Paint & Primer in Satin Nickel. I then used a sponge brush and dabbed on a little of the Rustoleum Metallic Paint in Champagne.

I finished with spraying on two protective coats of Rust-Oleum Satin Clear Enamel.

I then took a trip to one of my favorite stores, Hobby Lobby, with one of the knobs in hand on a mission to find coordinating knobs for the nightstand.

After surveying the collection, I purchased two knobs that had a similar design and feel. After I returned with the new knobs, I painted them with the same steps above to match the rest of the hardware. Note: The hardware at Hobby Lobby goes on sale to 50%, so if you need to purchase furniture hardware while saving a little money, wait for it to go on sale. :) I was more than content with the overall look of the pieces.

FINAL RESULT: THE BEAUTY, "BELLE"
The final product turned out even better than I was anticipating!

After all that work, I think she's ready for a new name, as the Beast just doesn't fit the bill anymore. I think Belle is more fitting, as she transformed from a beast into quite the Southern Belle after all...

For a few more pictures of her transformation...


BELLE'S NEW HOME:
As much as I wanted to keep these pieces, we just didn't have the room, so I had to put Belle back on the market to find a good home. Instead of hauling her back upstairs, we made a make-shift bedroom in our living room... We had to temporarily make a little mess to get the right setup, but in the end, it was worth it!

A little creativity, patience, and staging is all it took for us to create a dreamy bedroom feel.
And since there was no way I was hauling the upstairs guest bedroom mattress down the stairs for the setup, and then back up the stairs... we made a pseudo mattress to stage the bed. Who would have known this was under the bedding...?

After all was said and done, we made a $700 profit along with many lessons learned, so I would say it was well worth the time and effort!
Thanks for reading and hope you found something helpful, funny, or inspiring! Feel free to leave comments or questions below! Check out more How To's and Before & After's on my HOME MAKEOVERS page!
SaveSaveSaveSaveSaveSave


Comments