


Christmas Dining Room Decor
- Dec 22, 2017
- 4 min read
When it comes to Christmas... many people would say I tend to go "slightly" overboard... What can I say? I love ALL things Christmas!
When it comes to decorating, there are no rules. But for those of you where the idea of decorating gives a chill down your spine, I'm here to break it down in a simple, easy, and fun way. I'll even include a link to my tutorial on how to make your very own wreath chandelier. Let's start by taking a tour of my Christmas decor...starting with the Dining Room!
DINING ROOM TABLESCAPE:
This collection of accent trees has followed me through a few moves now. I find a new spot for this winter scene with every move.

The first step in decorating is determining a theme and color palette. Since I already had a lot going on in this room, I chose to keep the colors mainly neutral with champagne, silver, and gold along with a few pops of seafoam to tie in the already-existing color in the room. I decided to go with a rustic winter scene for the theme to coordinate with the current theme and feel of the room. This winter scene works great as a display for an entry table, buffet, or dining room table. (I'll show another setup option shortly.)
Having different colors, textures, and heights adds to making a memorable and effective display.

The champagne, silver, and gold Christmas trees were purchased from various decorating stores such as HomeGoods, Marshall's, Gordman's, Target, and House of J. When creating your landscape, vary the colors and heights. I alternated the silver, gold, and champagne trees to create depth and interest. I placed the tallest trees in the center and tapered the height down to the shortest trees on each end of the scene. The mercury glass candlestick holders and champagne glittered candlesticks (both from HomeGoods) were placed evenly throughout the scene (with the tallest ones towards the center).

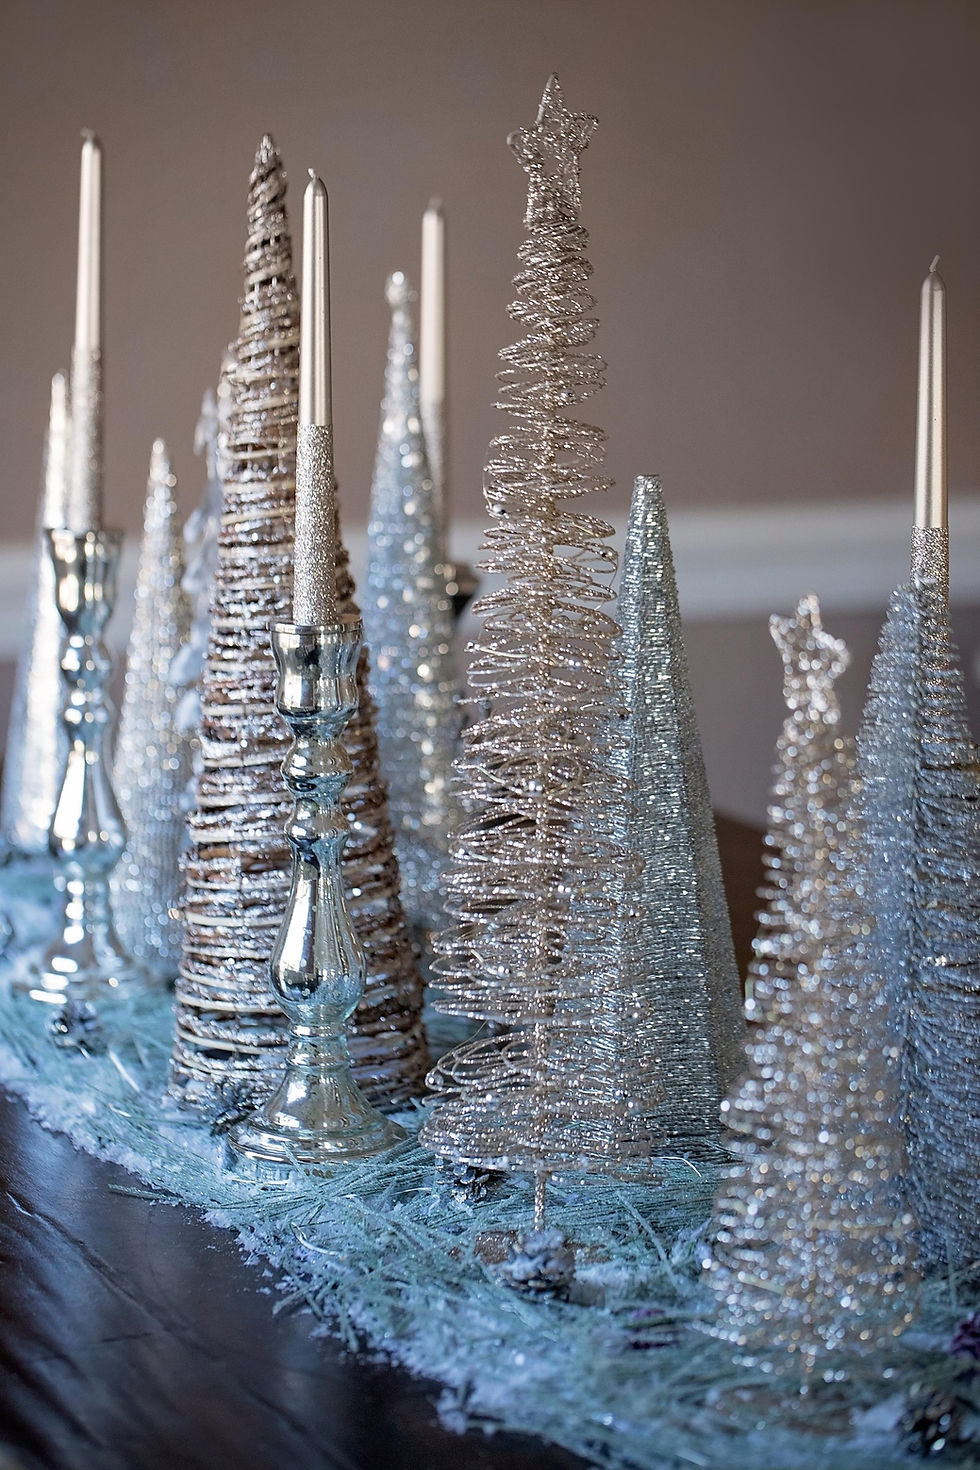
Sometimes it just takes flexing that creative muscle and looking around the house to find just what you need! I had extra pine branches from Michaels laying around, so I used wire cutters and snipped off the needles to create a faux pine needle base. Along with some faux snow, this created the perfect setting for my wintery scene. I placed battery-powered mini lights underneath the pine needles to give it a glowing effect, which looks especially pretty at night!


WINTER SCENE:
Just to show one more variation of the winter scene, this is an example of the trees setup on an entry way table that framed our living room.

I placed some of the pine needles and the lights under the glass tabletop.

One last view of the glittered reindeer. :)

DINING ROOM CHANDELIER:
I created this chandelier wreath by combining various champagne garlands and rustic stems along with glittered pinecones and pearl accents.

For a step-by-step tutorial, please click on my Chandelier Decorating 101 tutorial. For a high-level overview, I basically found a plain champagne garland wreath from Marshall's and cut an opening in the wreath to place it around the chandelier, which served as my base. I then securely inserted various stems into the wreath to incorporate the champagne, seafoam, and silver and rustic color theme. I basically used extra of what I had laying around the house.
I then added a few glittered pinecones (which I made a few years back). I basically spray painted the pinecones with Rustoleum Metallic Satin Nickel spray paint. After they were dry, I sprayed them with spray glue adhesive, immediately sprinkled them with silver glitter, and then rolled the edges in a contrasting champagne glitter to add some dimension.


The chandelier wreath was complete with pearl accents from Hobby Lobby. Easy peasy. To see the step-by-step Chandelier Wreath Tutorial, click HERE.

DINING ROOM SCONCES:
Including a small pine branch to each sconce added the little bit of wintry touch they needed.

DINING ROOM BUFFET:
For the buffet, I used the existing vases and started by filling the vases with frosted pine branches to give them some fullness.

Next I added contrasting greenery stems and a few of the silver accent stems (shown below).

Mixing two different greenery stems and a few of the silver accent stems added depth and appeal to the overall vase.

Adding a few different seasonal stems, glittered silver ball stems, and glittered pinecones (previously made as mentioned above) created the below look and gave the vases a seasonal touch.

Cream Buffet: Our Custom Creation (Check out our Furniture Makeovers page to see more!)
Chairs: HOMEGOODS
Table: POTTERY BARN
Pine Needles: MICHAELS
Trees: VARIOUS STORES (HOBBY LOBBY, MICHAELS, HOMEGOODS, GORDMAN'S, ETC..)
Mercury Glass Candlestick Holders: HomeGoods
Glittered Candlesticks: HOMEGOODS
Battery-Operated Lights: TJ Maxx
Champagne Wreath Base: Marshall's
Wreath Accents: Michaels & Hobby Lobby
Silver Vases: PIER 1
Grey Vase: Hobby Lobby
Frosted Pine Branches: HOBBY LOBBY & MICHAELS
Glittered Pinecones: SELF-CREATED
Mirror: ACCENT PRONE
Mercury Glass Sconces: HomeGoods
Cream Pillar Candles: Hobby Lobby
Fake Snow: Hobby Lobby
Check out my Christmas Decorating page for other ideas and "how-to's", including easy, step-by-step guides on wreath making, planter and floral arrangement creating, chandelier decorating, garland making, and more!


Comments