


Furniture Makeover: Phyllis > Aspen
- Jan 1, 2018
- 7 min read

BACKGROUND:
I'm project-oriented, hands-on, would rather go to the dentist than read instructions, I love a good deal, and love a good furniture makeover even better. I'm not afraid to get my hands dirty and with that said, am not afraid to go to the store mid-project, partially covered in paint. Usually it's the craft or hardware store at this point, so I figure they have to see more than just me decorated in paint and in my finest painting clothes. One of my many hobbies is to repurpose and update furniture pieces. Below you'll find step-by step instructions on how to give furniture a makover, peppered with behind-the-scenes comic relief.

COFFEE TABLE CHALLENGE (PHYLLIS):
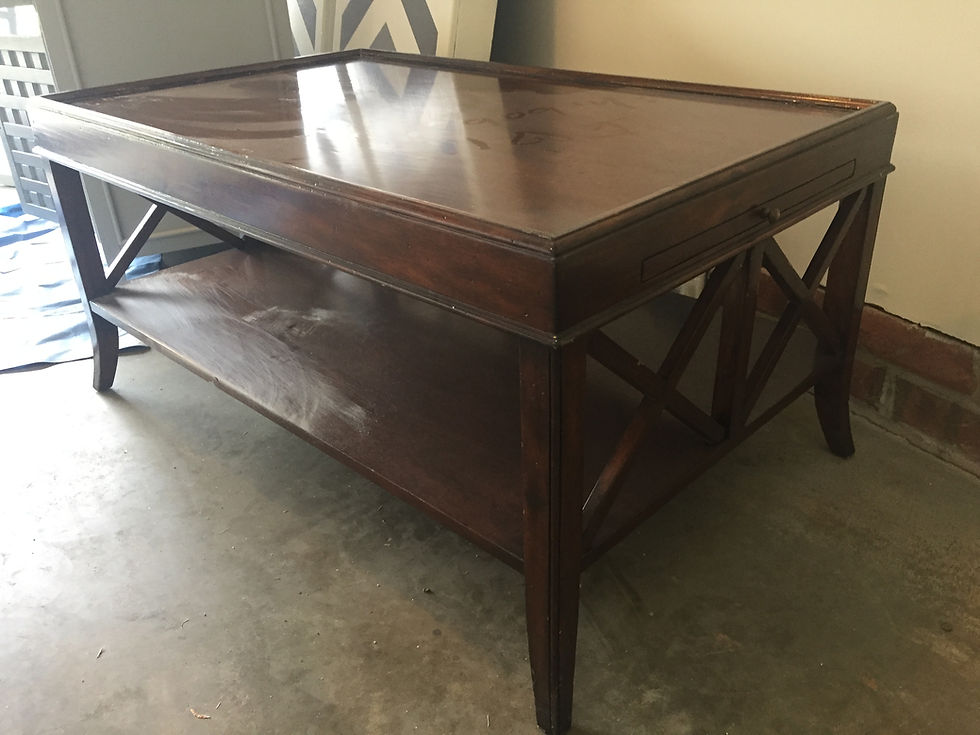
Sometimes you just can't pass up a good deal, as was the case with this coffee table. I discovered this piece online for only $24! I could tell it was made well and had some extra bonus functionality (with the pull out extending table trays), so knew this would be a deal I couldn't pass on.

At the time, I was currently working on the Beast > Beauty transformation as well as quite a few other furniture projects, so needless to say, my hands were a little full at the moment and I was a tad overcommitted... (Current garage/project situation below...)

I knew this little gal would have to sit on the sidelines for awhile until it was her time to shine. I didn't have an immediate plan for her reinvention, but had a good feeling that this would be one of my all-time favorite transformations. Covered in paint and dressed in my mid-project painting clothes, I made the short drive to pick her up and gave her a lift to her new home. After making room for her in the overly ambitious project space (aka the garage), she patiently waited her turn for the spotlight...
As mentioned before, being able to see the potential in a piece is crucial to its ultimate transformation. Even though I didn't have an end result in mind when I started this project, I knew that all the pieces would come together eventually. And that it did! Phyllis did not disappoint!

INSPECTION:

Since Phyllis was forced to hang out on the sidelines while the other pieces were brought to life, she accumulated quite a bit of dust. So dust cloth in hand, she was wiped clean to begin her thorough inspection of her present condition.
After assessing her current situation, the prognosis for Phyllis was pragmatically optimistic. Phyllis was a robust and hardy ol' gal, peppered with minor scars and scrapes. Lucky for her, I had a feeling we'd be going for a more rustic reinvention, so I knew that her scars and scrapes would only add "character" to her overall appeal.
1st STEPS:

First, hubs and I did a thorough sanding job on the ol' gal to try and remove as much of the varnish and finish as possible. Still not knowing her destiny, we opted to begin with as much of a clean slate as we could.
We started with the small handheld electric sander with medium grit sandpaper.

With the edges and details, this proved to be a little more difficult than we originally planned with the handheld sander, so we finished most of the sanding by hand.
Safety Sam Step: Make sure to wear a proper mask when sanding and painting!
CHALK PAINT (THE FUN BEGINS):
First, I draped plastic underneath Phyllis to avoid painting mayhem later. Since Phyllis required painting with unique angles and some challenging nooks and crannies, I opted to use this Wagner Paint Sprayer (instead of a brush), for most of the painting to speed up the time of the project.


Since we also had left over paint from Belle's project and still were undecided on what color to paint Phyllis, we decided a neutral color might be best until we figured out her final home and purpose.
We had previously purchased a gallon of paint in a "flat, chalk-like" finish from Lowe's My choice of color was called "Cozy White" which was a lovely cream color. Fun fact, Lowe's can make almost any color of paint there in a flat finish which is much more cost effective and still gives you that chalk paint-like finish.
I clothed myself in my best painting garb, a mask, and latex gloves and went to town painting. The first few coats went smoothly. I tried my best to act on previous lessons learned and be more patient with light, even coats of paint, while letting each coat "almost" dry in-between. That's what I call progress...

Miya even snuck in for a quick cameo appearance... Even though her white coat may tell you otherwise, I can assure you she did not fall victim to the paint sprayer...

I liberally loaded on ample coats of paint to ensure no part of the table was left behind.
After plenty of drying time, I decided it was time to "rough" it up a bit by distressing the piece to achieve the rustic look. Usings the medium grit sand paper, I started sanding the edges, corners, and anywhere else I saw fit to give it more added character and charm.

After thorough roughening up, it was still not living up to the "dream" piece we had envisioned it would be... So we started brainstorming and said a few prayers for extra creativity, and that's when it hit us... Why not take it up a few more rustic notches by adding reclaimed wood?!?


I digress for a quick tangent... The other day I randomly found a great deal on reclaimed wood, so took hubs along for the ride with his portable electric saw, and loaded up my small SUV with one too many pieces for "rainy day" arts and crafts projects... At the time, I didn't know exactly what I would use the reclaimed wood for, but had some good ideas and intentions... Little did we know its fate would be revealed much sooner than planned...

After going through our piles of reclaimed wood, trying out various wood combinations, and pilfering through ideas on Pinterest, we decided on using our white rustic weatherboard to create a new top for our coffee table, straight from an old farmhouse in Holly Grove, North Carolina. Talk about some historical charm.
We measured the table and measured the weathered pieces to determine exactly the right size for the boards. It was our lucky day as we had just the right amount of boards to make our vision a reality. We used a marker on the opposite side of the boards to know where to make the saw cuts.

After measuring and marking the wood, it was time to play with the big boys' toys... aka the electric saw. Few things make one feel more powerful than using some power tools... :)
Since we didn't have any sawhorses, we made makeshift sawhorses with paint cans. I sat on one side while hubs sawed the other side... I wouldn't exactly recommend this, but it worked for us in a crunch.


Since I married the most stubborn man alive, hubs refused to listen to me on the importance of wearing safety goggles as he blatantly ignored my advice about proper eye protection while using an electric saw... Do not follow his lead...
He has now lost both eyeballs in the process and 8 of his toes... I'm kidding, but he has lost sawing privileges until he agrees to wear proper eyewear (or my chemistry safety goggles) and proper footwear for the next project.
I will say he does look mighty fine and manly with that saw though... :)
Since I like to be independent and make sure I experience all parts of a project, I did saw some of the wood pieces myself... just for the record. :)

After all the wood was cut and eyeballs were still thankfully unharmed, we laid out the wood pieces to determine how we would want the tabletop to look.


After we were satisfied with the overall look and placement of the weathered wood pieces, we used copious amounts of wood glue along the edges and attached the pieces together on the coffee table.
TIP: If wood glue drips at all, make sure to wipe it up while it is still wet as it can be a messy situation later on to clean up after it is dry.

After admiring our hard work, we decided to fill in some of the previous nail holes. This was optional as the nail holes can add extra rustic-ness to the look, but I wanted to clean it up a touch. I filled in the holes with wood filler and sanded them smooth. We used Wood Icing as that is what we had on hand, but normal wood filler works just fine.

After the wood had dried and all wood remained attached, we added extra stability and rustic touches by hammering in two nails on each board, along the sides. This gave it the final touch we were looking for.


FINISHING TOUCHES:

To seal the weathered wood and keep it from chipping (no one wants to risk old paint chips floating around...), we generously lathered on a polyurethane finish all over the coffee table, including the weathered wood pieces and the painted parts. We used Minwax Pro Series Spar Urethane in Clear Satin, which kept the white color from turning yellow. This just slightly tamed down the creamy white finish to more of a subdued creamy white color which is what we were hoping for. Annie Sloan soft wax can also be used on the painted finishes.
FINAL RESULT: "ASPEN"
"The plan is to...not have a plan." Sometimes not having a plan and instead having a little faith, is the only plan you need... The final product turned out even better than we could have imagined! She was definitely no longer a Phyllis and needed a new, hip name to complete her transformation. To tie in her tree-like heritage and rustic roots (no pun intended...), her new outdoorsy name will be Aspen.

We loved the added functionality and space too with the extending table trays that Aspen had to offer.

ASPEN'S NEW HOME:
We loved how our new piece turned out so much that we decided to keep it! Aspen now resides in our living room and is one of our all-time favorite furniture makeover pieces. This really was a project for two! She was not only fun to create, but we both felt a huge sense of accomplishment in her transformation and love that we created her together. She not only is a great conversational piece, but functional as well. I have a good feeling that she will be a lifelong staple in our home.
Check out our Living Room transformation with decor inspiration and wall collage tutorials, on our Home Makeovers page.


She fits in perfectly with our rustic wall collage, so we knew it was meant to be.

Here are just a few more closeups of our reinvented, rustic coffee table...


Thanks for reading and hope you found something helpful, funny, or inspiring! Feel free to leave comments or questions below! Check out more How To's and Before & After's on my HOME MAKEOVERS page!
SaveSaveSaveSaveSaveSave


Comments